So you are eagerly waiting for to know this. How to bring AutoCAD file to Revit Architecture. And how you can create wall, columns, beams, windows, ventilators etc. and all those required elements in Revit. I am going to explain you about this in here.
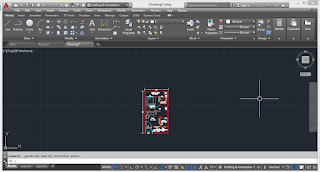
First create any 2D drawing or floor plan in AutoCAD. After making the plan you save it and open a new tab in AutoCAD. You select it that old file and copy it and paste it to the new tab in AutoCAD. After pasting it you save it again and give a file name so that you can open in Revit by seeing the file name. You can see it here, where I have taken screenshot to show you.
 After bringing the drawing give a name to it and save it by your choice. So that you can open it on Revit easily..........Now open you Revit software and click on the insert tab. You will see that there is a option called Import CAD. You click it on their and a new dialog box will appear. Wait I will explain you step-by-step.


As you can see in the picture that I have given you step-by-step process. After the dialog box appears of about importing CAD, the main step is here. You see on the dialog box that many options are available there. Wait I will show you about which part I am talking about.
No need to check current view only, keep it uncheck. Then in the colours option keep it "Preserve". Don't select any other option. Then in the Layers/Level option keep it "All". Then in the Import Units keep it "millimeter" or "centimeter" or "meter" as you have created(taken) in AutoCAD plan. Then in the Positioning option keep it "Auto-Center to Center". After that in the Place at option keep it "Plinth level" from where the floor plan will be created. And at last check the Current to View. After that click on open tab and you will see that the floor plan appears at the screen. As you can see it here
Wait, wait, wait don't be confused with the AutoCAD image and the Revit image of floor plan. It's only just to give you the steps, how to do it. The above AutoCAD image is the floor plan made, that I have created earlier. But in the Revit image is the floor plan that I have made differently. But the process followed is same, as I have explained above. Don't be confused that I had made this floor plan in Revit only. No, it's not like that. I have first made the floor plan in AutoCAD and after that I have brought it in Revit Architectural software.
 After bringing the drawing give a name to it and save it by your choice. So that you can open it on Revit easily..........Now open you Revit software and click on the insert tab. You will see that there is a option called Import CAD. You click it on their and a new dialog box will appear. Wait I will explain you step-by-step.


No need to check current view only, keep it uncheck. Then in the colours option keep it "Preserve". Don't select any other option. Then in the Layers/Level option keep it "All". Then in the Import Units keep it "millimeter" or "centimeter" or "meter" as you have created(taken) in AutoCAD plan. Then in the Positioning option keep it "Auto-Center to Center". After that in the Place at option keep it "Plinth level" from where the floor plan will be created. And at last check the Current to View. After that click on open tab and you will see that the floor plan appears at the screen. As you can see it here

And how to create walls, columns, doors, windows, ventilators all these are explained in this link click here.
Thank You and you can follow me on
Comments
Post a Comment
Please do not enter any spam comment.